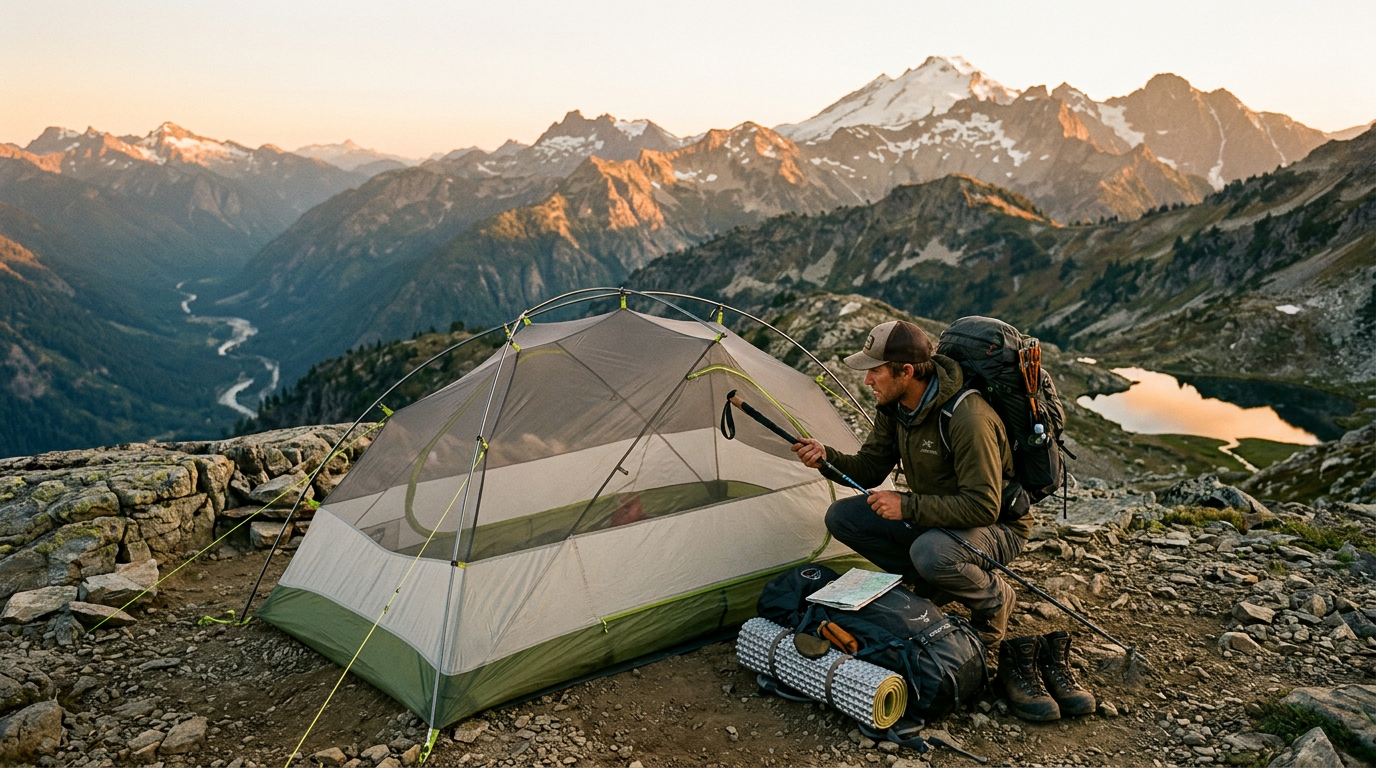
Buying guide
Insulated Bottle Buying Guide: Stainless vs Vacuum vs Single-Wall
Disclosure: Four Seasons Gear is reader-supported. When you buy through links on our site, we may earn an affiliate commission at no extra cost to you. Prices and availability are accurate as of the time we last checked.
What You're Really Deciding
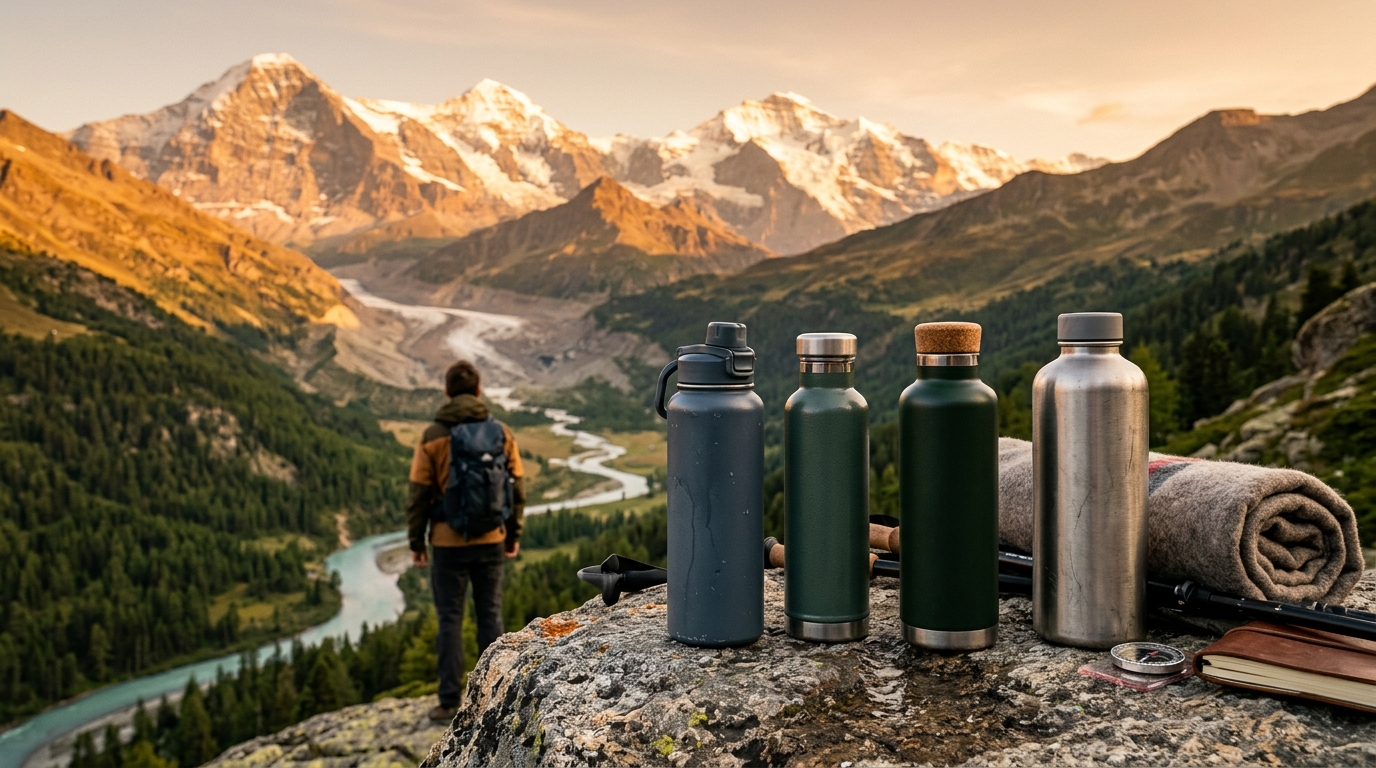
The water bottle market breaks into three construction types, each optimized for different priorities. Single-wall bottles (plastic or metal) are lightest and cheapest but offer zero insulation. Vacuum-insulated stainless steel bottles keep liquids hot or cold for 6-24 hours but add 50-150% more weight. Standard stainless steel bottles without vacuum insulation split the difference—more durable than plastic, some thermal benefit from metal mass, but nowhere near vacuum performance. Your decision hinges on trip duration, temperature swings you'll encounter, and whether you're counting grams or prioritizing a hot lunch drink at 11,000 feet.
Construction Types Explained
Understanding what's actually happening inside the bottle wall clarifies why performance and weight vary so dramatically across designs.
Single-Wall Construction
A single layer of material—typically BPA-free plastic (Tritan, polypropylene, HDPE) or thin stainless steel—separates your liquid from ambient air. The Nalgene 32 oz Wide Mouth Water Bottle exemplifies this category: 6.25 oz empty, bombproof Tritan construction, zero insulation. Heat transfers freely through the wall in both directions. Pour in cold water on a summer trail and it's lukewarm in 90 minutes. Fill it with boiling water for tea and the exterior becomes too hot to hold within seconds.
Specs
Single-wall bottles win on three fronts: weight (a 32 oz Nalgene weighs less than a 20 oz vacuum bottle), cost, and liquid versatility. You can safely put acidic drinks, electrolyte mixes, or even boiling water in quality single-wall bottles without worrying about damaging a vacuum seal or interior coating. They're also dishwasher-safe and freeze-compatible—fill one 3/4 full and toss it in the freezer for ice water the next day.
Vacuum-Insulated Double-Wall
Two stainless steel walls with the air pumped out between them. The vacuum layer blocks conductive and convective heat transfer; only radiant heat crosses the gap, and most designs add a reflective coating to minimize even that. The Stanley Classic Vacuum Bottle 1.1 QT and Hydro Flask Water Bottle — 32 oz Wide Mouth Flex Lid both use this construction, delivering 12-24 hour cold retention and 6-12 hour hot retention depending on fill volume and ambient conditions.
Specs
The vacuum seal is permanent—you can't service it. If the bottle dents severely enough to compromise the inner wall, insulation performance degrades irreversibly. That's why quality vacuum bottles use 18/8 food-grade stainless (18% chromium, 8% nickel) with thicker gauge steel than single-wall designs. The tradeoff is weight: a 32 oz Hydro Flask weighs 13.4 oz empty, more than double a comparable Nalgene.
Standard Stainless Steel (Non-Vacuum)
A single thick wall of stainless steel, sometimes with a thin air gap or foam layer but no vacuum seal. These occupy a middle ground: 8-11 oz for a 32 oz capacity, moderate insulation (2-4 hours cold retention), and lower cost than vacuum designs. The metal mass provides some thermal inertia—better than plastic, far short of vacuum.
This category has largely been squeezed out by vacuum bottles dropping in price. Unless you find one on deep discount, a vacuum bottle delivers vastly better performance for a modest weight penalty. The exception: if you specifically need a metal bottle for durability but insulation is irrelevant (say, for a water source you'll refill every 2 hours), standard stainless saves a few ounces versus vacuum.
Key Specifications to Evaluate
Capacity and Weight Ratio
Bottles range from 12 oz (espresso-focused) to 64 oz (car camping). The 20-32 oz range hits the sweet spot for day hiking and backpacking—enough for 2-3 hours between refills without excessive carry weight. Pay attention to weight-per-ounce-capacity: single-wall plastic runs 0.15-0.20 oz per oz capacity, vacuum stainless runs 0.35-0.50 oz per oz capacity. A 40 oz vacuum bottle weighs as much as a 64 oz Nalgene.
Specs
Mouth Opening Diameter
Wide-mouth (2.5-2.75 inches) versus narrow-mouth (0.75-1.5 inches) affects ice loading, cleaning, and drinking flow rate. Wide-mouth bottles accept standard ice cubes, accommodate a sponge or bottle brush for scrubbing, and let you pour in drink mixes without a funnel. They also dump water faster when you tip them—great for chugging, less ideal for sipping while hiking steep terrain.
Narrow-mouth designs control flow better and reduce spill risk when drinking on the move. Some vacuum bottles offer both: a wide-mouth body with interchangeable narrow-pour and wide-chug lids. If you'll only own one bottle, wide-mouth is more versatile; if you're building a quiver, narrow-mouth excels for hot liquids (coffee, soup) where you want controlled sips.
Lid and Seal Design
Lids fall into four categories: screw-on (most secure, slowest access), flip-top (one-handed, prone to leaking if not closed fully), straw (convenient, adds failure points), and pour-through (insulated cap with button release). For backcountry use, screw-on lids with silicone gaskets are most reliable—they don't leak in a pack even under pressure changes during altitude gain.
- Screw-on: Best seal integrity, requires two hands, slowest access
- Flip-top: One-handed operation, must verify latch closure, moderate leak risk
- Straw lids: Easiest drinking, straw can trap bacteria, not packable
- Pour-through cap: Good for hot liquids, adds complexity, heavier
Check whether the lid is top-rack dishwasher safe—many flip-top mechanisms use plastic components that warp in high heat. Screw-on lids with fewer parts are generally more dishwasher-tolerant and easier to replace if lost.
Interior Coating and Material Compatibility
Stainless steel bottles may have no interior coating (bare 18/8 steel), an electropolished finish, or a proprietary coating. Bare steel is inert and safe for all beverages but can retain flavors—brew coffee in it one day and your water may taste faintly of coffee for a few refills. Electropolished interiors resist flavor transfer better and clean more easily.
Plastic bottles (Tritan, polypropylene) are chemically resistant to acids, electrolytes, and most drink mixes. They're safe for freezing—just leave 1-2 inches of headspace for expansion. Stainless bottles should NOT be frozen with liquid inside; the expansion can deform the walls and break vacuum seals.
Match the Gear to Your Trip
Use this decision tree to narrow your construction type based on how you'll actually use the bottle.
- Day hiking, temperate weather, water sources every 2-3 hours → Single-wall plastic (Nalgene-style). Lightest, cheapest, sufficient.
- Day hiking, hot weather, want ice water all day → Vacuum stainless, 20-24 oz. Ice lasts 12+ hours, worth the weight for comfort.
- Backpacking, counting every ounce, frequent water sources → Single-wall plastic. Pair with a water filter; refill often rather than carrying insulated weight.
- Backpacking, cold weather, want hot drinks at camp → Vacuum stainless, 20-32 oz wide-mouth. Boil water in the morning, still hot 8 hours later for soup or tea.
- Car camping, base camp, or group trips → Vacuum stainless, 40-64 oz. Weight doesn't matter; thermal performance is king. Consider a Stanley Classic Vacuum Bottle 1.1 QT for shared hot beverages.
- Ultralight fastpacking, every gram counts → Single-wall plastic, 20 oz max, or a collapsible bottle (not covered here). Insulation is a luxury you can't afford.
- Trail running, want to drink without stopping → Single-wall with straw lid or narrow-mouth pour spout. Vacuum bottles are too heavy for running vests.
Durability and Longevity Considerations
Single-wall plastic bottles are nearly indestructible in terms of impact—drop a Nalgene off a cliff and it bounces. But UV exposure and repeated freeze-thaw cycles degrade plastic over 3-5 years; it becomes brittle and cloudy. Stainless steel bottles last decades if you don't lose them. The vacuum seal in double-wall bottles is the weak link: a severe dent or puncture kills insulation permanently, though the bottle remains functional as a non-insulated container.
Lid gaskets wear out every 2-4 years depending on use frequency. Most manufacturers sell replacement gaskets for $3-$8. If your bottle starts leaking, replace the gasket before assuming the bottle is toast. Threads can cross-thread if forced; always start threading carefully and back off if you feel resistance.
Cleaning and Maintenance
Single-wall plastic and stainless bottles are dishwasher-safe (top rack for plastic, either rack for steel). Vacuum bottles should go on the top rack only—high heat can stress the vacuum seal over time. For bottles used with anything other than plain water, wash within 24 hours to prevent bacterial growth and odor buildup.
- Daily rinse: Hot water and a drop of dish soap, shake vigorously, rinse thoroughly.
- Weekly deep clean: Bottle brush with soapy water, paying attention to lid threads and gasket grooves.
- Monthly deodorize: Fill with warm water and 1 tablespoon baking soda, let sit overnight, rinse well.
- Stubborn odors: 1:1 white vinegar and water, soak 2-4 hours, scrub, rinse thoroughly.
Never use bleach or chlorine cleaners in stainless steel bottles—they can corrode the interior and damage the vacuum seal. Avoid abrasive scrubbers on vacuum bottle interiors; they can scratch the coating. For narrow-mouth bottles, a long-handled bottle brush is essential; for wide-mouth, a sponge on a stick works fine.
Price and Value Analysis
Single-wall plastic bottles run $8-$25 for name-brand options (Nalgene, CamelBak). Generic versions drop to $5 but often use lower-grade plastic that retains odors. Single-wall stainless runs $15-$30. Vacuum-insulated bottles span $25-$55 for reputable brands (Hydro Flask, Stanley, Klean Kanteen), with premium models hitting $60-$75 for specialized features like one-handed operation or integrated storage.
The value equation shifts based on use frequency. If you hike once a month, a $12 Nalgene serves you fine for years. If you're outdoors three days a week and temperature retention materially improves your experience (hot coffee on alpine starts, ice water on desert hikes), a $40 vacuum bottle pays for itself in comfort within a season. The Hydro Flask Water Bottle — 32 oz Wide Mouth Flex Lid hits a sweet spot: proven vacuum performance, widely available replacement parts, and a mid-range price.
Common Pitfalls to Avoid
Overbuying capacity is the most frequent mistake. A 64 oz vacuum bottle weighs 2+ pounds empty—more than many ultralight backpacking tents. Unless you're car camping or establishing a base camp, anything over 40 oz is overkill. Plan your capacity around refill frequency, not worst-case scenarios.
Ignoring lid compatibility with your pack's bottle pockets is another gotcha. Some flip-top lids add 2-3 inches of height; if your pack's side pocket is sized for a standard bottle, the lid may protrude and catch on branches. Measure your pack's pocket depth before committing to a tall lid design.
Assuming vacuum bottles are "set it and forget it" leads to disappointment. Pre-chilling or pre-heating the bottle dramatically improves performance. For cold retention, fill with ice water, let sit 5 minutes, dump, then add your ice and cold liquid—you've just pre-conditioned the steel. For hot retention, fill with boiling water, wait 5 minutes, dump, then add your hot beverage. This simple step adds 2-4 hours of effective retention.
Frequently Asked Questions
+Can I put a vacuum-insulated bottle in my pack's side pocket without worrying about it sweating?
Yes—that's the primary advantage of vacuum insulation. Because heat transfer is blocked, the exterior stays at ambient temperature. A vacuum bottle full of ice water won't condense moisture on the outside even in humid conditions. Single-wall bottles sweat profusely because the cold interior chills the exterior below the dew point, causing atmospheric moisture to condense on the surface. This is why vacuum bottles don't need insulating sleeves and won't soak your pack's contents.
+How do I know if my vacuum bottle's seal is compromised?
Fill the bottle with ice water, close it, and wait 4-6 hours in room temperature conditions. If the exterior feels cold to the touch (not just cool, but noticeably cold), the vacuum seal has failed. A functioning vacuum bottle's exterior should remain at room temperature. You can also listen: tap the side of the bottle with a knuckle. A good vacuum bottle produces a higher-pitched, more resonant sound than a single-wall bottle because the vacuum layer changes acoustic properties. If it sounds dull and solid, the vacuum may be compromised. Note that minor dents don't usually break the seal—only punctures through both walls.
+Is it safe to put boiling water directly into any stainless steel bottle?
Yes for the bottle itself—18/8 stainless steel is rated for boiling temperatures. However, check the lid specifications. Many plastic lid components (flip-tops, straw mechanisms) are rated only to 180-200°F and can warp or release plasticizers at boiling temperature (212°F at sea level). Screw-on lids with silicone gaskets typically handle boiling water fine. If you plan to regularly fill with boiling liquids, verify the lid's temperature rating in the manufacturer specs. Also be aware that a vacuum bottle filled with boiling water will keep that liquid dangerously hot for 6+ hours—clearly mark the bottle to avoid accidental burns.
+Do I need a different bottle for electrolyte drinks versus plain water?
No, but cleaning discipline matters more with electrolyte drinks. Both plastic and stainless steel are chemically inert to standard electrolyte mixes (sodium, potassium, magnesium salts). The issue is residue: dried electrolytes leave a film that can harbor bacteria and cause odors if not cleaned within 24 hours. If you alternate between plain water and electrolyte drinks in the same bottle, do a full wash with soap and a brush between uses. Some people prefer to dedicate one bottle to plain water and another to mixes purely to avoid the cleaning hassle, not because of material compatibility issues.
+Will a vacuum bottle keep my water cold if I'm hiking in 95°F heat all day?
Yes, but with caveats. Start with ice and pre-chilled water, and minimize opening the bottle. Each time you open it, you exchange the cold interior air for hot exterior air, degrading performance. A quality vacuum bottle will keep ice frozen for 12-18 hours in 95°F ambient if you're disciplined about keeping it closed. Expect your water to be cold (50-60°F) but not ice-cold by hour 8-10. If you're opening it every 30 minutes for sips, performance drops—consider a smaller vacuum bottle that you'll drain in 2-3 hours and refill from a larger single-wall bottle stored in your pack's shaded interior. This hybrid approach balances weight and thermal performance.
+Can I use a single-wall plastic bottle for hot liquids like tea or coffee?
Check the manufacturer's temperature rating. Most Tritan and polypropylene bottles are rated to 180-200°F, which is below boiling but sufficient for brewed tea or coffee that's cooled for 2-3 minutes. Pouring boiling water directly into a plastic bottle can warp it or cause the plastic to release odors (not necessarily harmful, but unpleasant). If you want a hot drink on the trail, a vacuum stainless bottle is the better tool. Single-wall plastic excels for cold and room-temperature liquids where weight matters more than temperature retention.